Make Hair Bows
 Make Hair Bows or Buy Them! Make Hair Bows or Buy Them!
You want to make hair bows but you don’t know if you're going to enjoy it or not. So you don't want to invest a lot of money (or time) into this project until you know for sure it's the right hobby for you.
We get that, don't worry. That's why we've put together this set of four tutorials for you. There are others scattered around the site as well but these 4 will let you learn how to…
These will lay the foundation of your hair bow making journey and should provide enough experience for you to decide if making hair bows is something you want to pursue. We know you're going to have a blast with these. They are simple and fun bows to make. You're also going to be excited to be able to make hair bows for your little girl and for yourself that are EXACTLY what you are looking for instead of having to make due with ones you can find. (of course we try to supply a little something for everyone over in our Boutique Hair Bows section. But we know it's no substitute for the variety you can make for yourself) Oh, and don't forget how much money you'll be saving when you make hair bows instead of buying them! So without further ado, let's make some hair bows.. |
Sign Up...
For Hair Bows Updates & Specials...
|
Make Hair bows out of fabric
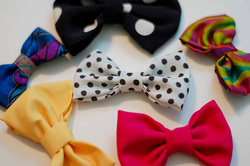 Make Hair Bows Out Of Fabric
We're going to make hair bows out of fabric scraps.
This simple technique is a great way to use up the left over bits and pieces when you. This insures that your hair bows perfectly match your outfit.
If you don't sew, remnants or fat quarters at your local craft or sewing store are inexpensive and easy to use.
This simple technique is a great way to use up the left over bits and pieces when you. This insures that your hair bows perfectly match your outfit.
If you don't sew, remnants or fat quarters at your local craft or sewing store are inexpensive and easy to use.
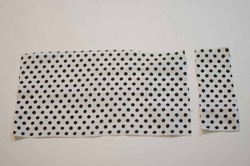 Make Hair Bows Out Of Fabric Step 1
To begin, cut a rectangle out of the fabric of your choice.
Then cut a strip off the end about an inch to an inch and a half wide.
Experiment with size to get the size bow you are wanting. Just remember that the finished bow will be a little less than HALF the size of the longest piece.
Then cut a strip off the end about an inch to an inch and a half wide.
Experiment with size to get the size bow you are wanting. Just remember that the finished bow will be a little less than HALF the size of the longest piece.
 Make Hair Bows Out Of Fabric Step 2
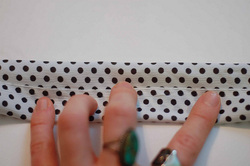
Now fold the longest piece in half so both long edges meet in the middle.
This is the part that will form the "bow" when complete.
If your fabric is slippery or you want a little extra insurance it'll stay put while you work. You can use a few dots of hot glue along the edge.
Or you could baste it closed.
This is the part that will form the "bow" when complete.
If your fabric is slippery or you want a little extra insurance it'll stay put while you work. You can use a few dots of hot glue along the edge.
Or you could baste it closed.
 Make Hair Bows Out Of Fabric Step 3
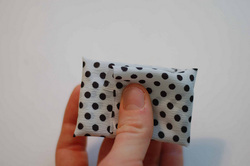
Fold your ends into the center.
You want them to meet in the middle and overlap slightly but not too much.
Again, you can add a dab of hot glue or baste together at this point.
You want them to meet in the middle and overlap slightly but not too much.
Again, you can add a dab of hot glue or baste together at this point.
 Make Hair Bows Out Of Fabric Step 4
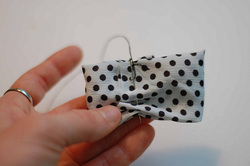
Take three big stitches across the center of your folded bow.
Then pull up on the thread synching together the middle of your bow.
Wrap your thread around the middle two or three times and secure. Set this piece aside for a moment.
Then pull up on the thread synching together the middle of your bow.
Wrap your thread around the middle two or three times and secure. Set this piece aside for a moment.
 Make Hair Bows Out Of Fabric Step 5
Now you'll make the band that holds your bow shut.
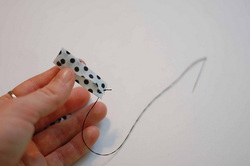
Using the smaller rectangle fold the long ends into the center as you did with the larger piece.
Thread your needle thru the end as shown. Baste closed if using very slippery fabric.
You could also use a contrasting bit of ribbon for this step.
Using the smaller rectangle fold the long ends into the center as you did with the larger piece.
Thread your needle thru the end as shown. Baste closed if using very slippery fabric.
You could also use a contrasting bit of ribbon for this step.
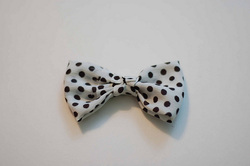 Make Hair Bows Out Of Fabric Step 6
Wrap the smaller folded bit of fabric around the middle of your bow.
Stitch closed and secure your threads. I like to bury them inside the folds so there are no loose ends dangling.
You just made a hair bow out of fabric. Now slip an alligator clip into it and it's ready to wear!
Stitch closed and secure your threads. I like to bury them inside the folds so there are no loose ends dangling.
You just made a hair bow out of fabric. Now slip an alligator clip into it and it's ready to wear!
make hair bows for girls like these....
make hair bows with tulle
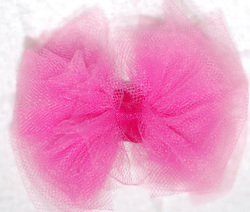 Courtesy of The Polka Dot Umbrella
It's easy to make hair bows with tulle.
What you'll need is...
What you'll need is...
- 2 strips of tulle 36-48 inches long. The width is up to you I like to use either 3 or 6 inch wide strips. Tulle ribbon is usually 6 inches wide so use as is or cut it in half.
- Thread, string or a small strip of tulle (to tie the bow together in the center)
- 4 inches of ribbon
- Alligator hair clip or hair band
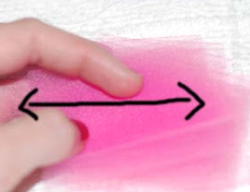 Make Hair Bows With Tulle Step 1
Fold one long strip of tulle like an accordion or paper fan.
Remember the paper fans you used to make as a kid? Here's your chance to put that skill to work.
TAKE THAT MRS TATER! (my much beleagured 2nd grade teacher who assured me I didn't need to practice making fans out of my assignments)
Our friends over at The Polka Dot Umbrella like to make 6 folds but I find if you use wider tulle it works better with 8-10 folds. Play around with it and see what you like best.
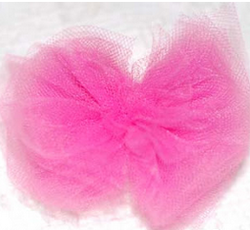 Make Hair Bows With Tulle Step 2
Tie your string, thread or bit of tulle around the middle of your folded tulle.
This will synch it closed in the middle and secure it.
Now fluff out your ends a little and see if you like the thickness. If not snip your thread and refold until you are satisfied with how it is shaped.
Repeat these steps with the other strip of tulle.
This will synch it closed in the middle and secure it.
Now fluff out your ends a little and see if you like the thickness. If not snip your thread and refold until you are satisfied with how it is shaped.
Repeat these steps with the other strip of tulle.
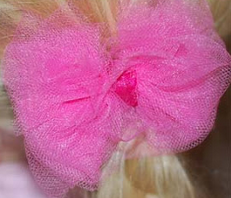 Make Hair Bows With Tulle Step 3
Layer both tulle bows on top of one another.
Then tie your ribbon around the center securing them together. Trim ribbon ends and heat seal to prevent raveling.
Insert your alligator hair clip thru the back of the ribbon loop. OR Tie your tulle bow to a hair band with the ribbon you used to tie it together with before trimming off the ends.
Then tie your ribbon around the center securing them together. Trim ribbon ends and heat seal to prevent raveling.
Insert your alligator hair clip thru the back of the ribbon loop. OR Tie your tulle bow to a hair band with the ribbon you used to tie it together with before trimming off the ends.

