how to make korker hair bows
 How To Make Korker Hair Bows How To Make Korker Hair Bows
So you want to know how to make korker hair bows. You're not alone and are in good company.
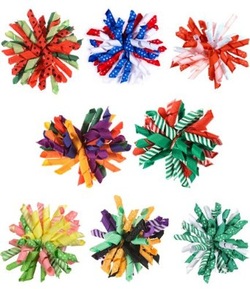
These fun and funky bows are popular with everyone from little girls to cheerleaders. Don't Forget! Claim Your Free Hair Bow Lesson :) I like to think of them as "messy on purpose". Korker hair bows are just plain fun. Their chaotic appearance lends them a charm that is indisputable. And don't think they are only for casual wear. Far from it. A korker made out of fancy gold and silver ribbons stands up to the most discerning of occasions. |
Sign Up...
For Hair Bows Updates & Specials...
|
Ok... Let's learn how to make korker hair bows for girls!
Before we go any further here's a list of what you need. We'll explain in detail how to use them all in a moment.
- Grosgrain Ribbon
- Wooden Dowels
- Wooden Clothespins
- Cookie Sheet
- Hair Band or Hair Clip
- Candle or Lighter or Matches
- Thread (optional)
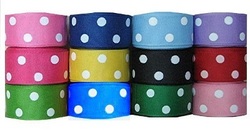 Price Grosgrain Ribbon Here
The first thing you need to do is select your ribbon.
Grosgrain works best because it not only holds its shape well after curling but it is a very sturdy ribbon as well. And it comes in a virtual rainbow of colors, sizes and patterns.
That's important with a hair bow like a korker because by its very nature there's a lot of movement of the ribbons as it's being worn. A delicate ribbon wouldn't survive being jostled about and rubbing on itself like grosgrain does.
how to make korker hair bows the easy way... cheat!
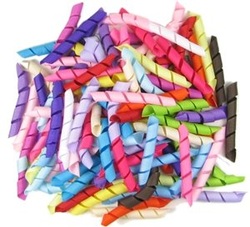 Price Korker Hair Bow Ribbon
Now that you've selected your ribbon you'll need to curl it. Or you can cheat and buy korker ribbon already curled and cut to length.
To do this you're going to cut your wooden dowels so they'll fit onto your cookie sheet. Then wrap your ribbon tightly around the dowels securing it at each end with a clothespin.
Once all your dowels are wrapped place the cookie sheet into your oven and bake at 275 degrees for 25 minutes.
Remove your ribbons from the oven and let cool!
If you want the ribbon to hold it's shape it is IMPORTANT to let the ribbon fully cool before removing it from the dowels!
You probably don't want a korker hair bow that's as big as a cookie sheet so you'll need to cut your long spirals of ribbon down to size.
I recommend cutting the ribbon on a slant. I just think that looks best but no matter how you cut it be sure to heat seal the ends so they do not fray.
how to make korker hair bows so the ends don't fray
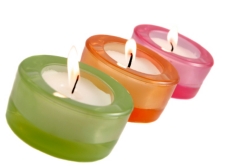 Heat Seal Korker Hair Bows
To do this simply run the ends of the ribbon QUICKLY thru the flame of your candle or use a lighter or match.
Personally, I like using a candle because you'll go thru a ton of matches doing this and I hate lighting the lighter over and over.
After all your ribbon spirals are cut to size and the ends heat sealed. Take a length of uncut ribbon, or thread if you prefer (If you're using thread I recommend using embroidery floss in a complimentary color) smooth it flat on your work surface. Then lay your curly ribbons across it one on top of the other. Point them in different directions and keep adding ribbons until you have the fullness you are after for your korker hair bow.
When your bow is full enough tie your ribbon or thread to together. This will synch all the corkscrew ribbons in the center and make something of a pom-pom effect.
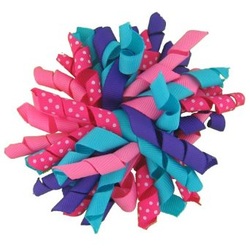 Our Korker Hair Bows
Now fluff your ribbons into place and attach your korker to a hair band or hair clip with the tails of the ribbon you used to synch it closed.
Trim these tails and heat seal them if you used ribbon.
Poof! You've just learned how to make korker hair bows!
Be sure to share send us pictures of your finished master pieces. We love to see what our guests make. It give us and others inspiration.
Trim these tails and heat seal them if you used ribbon.
Poof! You've just learned how to make korker hair bows!
Be sure to share send us pictures of your finished master pieces. We love to see what our guests make. It give us and others inspiration.
